We’ve all been in the situation where you search for something, you know it’s there and you probably know how to find it with a workaround of some sort but this really shouldn’t be required.
I had this very situation recently whereby for some reason CRM had decided it wasn’t going to search Full Names of contacts which as you can imagine had caused some headaches for users.
So today I’m going to go through the steps required to change what fields CRM uses to search for specific records, it’s a quick and easy change which can make the user experience a hundred times more efficient.
Changing Available Searchable Fields
Now CRM has two major options that can affect whether a field is searchable or not, the first is a specific option called Searchable which is part of the field itself and the second is in the search settings and is whether a field is actually used or not. So first we need to make sure the field we want to search by is Searchable.
- To start go to the record type that you want to modify the search of, in this guide I’ll be referring to Accounts specifically but any record that’s searchable will have a similar process.
- Once you’re in the view showing the record type you’re modifying open the ellipses menu (…) found in the command bar at the top of CRM.
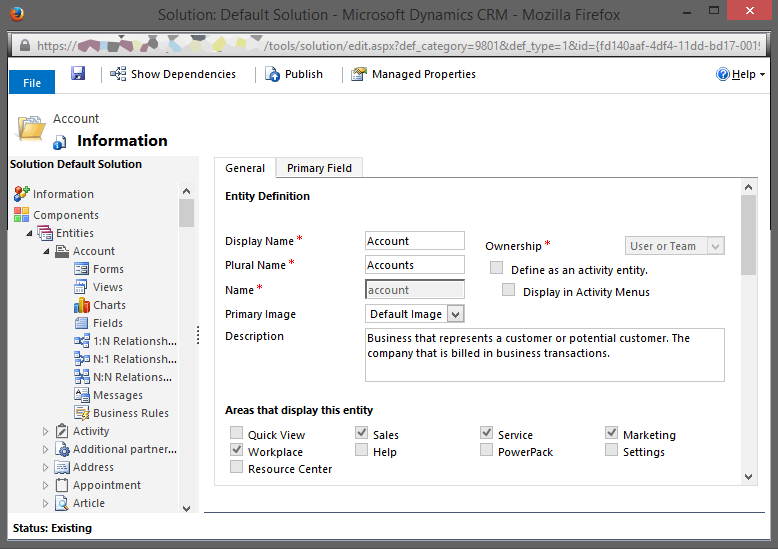
- Click Customize Entity which should open a new window similar to below.
- The window should by default have whatever record type you were viewing when you opened this open by default, navigate to the Fields section found in the left-hand menu.

- You now need to find whatever field you would like to search by, the easiest way for most users will be to sort by Display name which is the label used in Forms.

- Open the field settings by double-clicking on the name which will open another window, you now want to look at the Searchable setting found on the right of the window which should be set to Yes so that it is available to search by.

- Click Save and Close at the top-left which will close the window, then click Publish All Customizations in the remaining window but don’t close this window.
- The field is now available to be searched by, but it won’t actively be searched unless you tell CRM to which I’ll go into next.


Modifying Which Fields CRM Searches
Now that the field you want to search by is available to be searched we now need to tell CRM that we want to search by his field, to do this go to the record type you want to modify again, again I’ll be using Accounts as an example.
- If you closed it originally you’ll need to re-open the Solution window which you can access by going to the ellipses menu in the command bar then clicking Customize Entity.
- Now select Views in the left-hand menu.
- You want to find a view that is called “Quick Find Active (Record Name EG. Accounts)”, double-click to open the view settings.

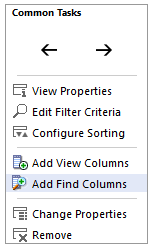
- In the new window click “Add Find Columns” which can be found on the right-hand menu.

- In the Add Find Columns interface find and check the field which you made searchable earlier then click OK to apply.
- Save and Close the View options window.
- Click Publish All Customizations in the remaining window then close that too.
- Do a quick refresh then try searching by your new field which should then show you the results you were after.

If you want me to discuss how to do anything that I’ve not covered before then please comment below and I’ll try to make it happen.
