This is going to be a rather complex technical article covering how to create the custom workflow step required to email all individual users in a team. This is useful for support desks or situations where you can’t or don’t want to directly email the team.
I’ll try my best to simplify this topic enough so that an individual with little to no prior experience should be able to follow it, however, if you just need to implement the functionality quickly and don’t mind paying for it I believe there are some companies or solutions online which may do this.
If you’re just wanting the code itself then check out my GitHub project – https://github.com/ShaunWilkinson/CreateActivityPartyFromString
Requirements
Before we get started you will need at least the following –
- Visual Studio (any version should do including community) – https://www.visualstudio.com/vs/community/
- The latest Dynamics CRM SDK Tools – https://docs.microsoft.com/en-us/dynamics365/customer-engagement/developer/download-tools-nuget
- Administrator level permission in CRM (I believe)
Create the Custom Workflow Step
In this stage, I’m working on the assumption that you have Visual Studio installed, the latest CRM SDK Tools and administrator permissions. If you don’t I’m sure there are plenty of guides online that can assist but if not comment below and I’ll make some.
- Open Visual Studio, expand the File tab > New > Project.

- In the window that opens expand Visual C# > Workflow and select ‘Activity Library’.
- Give the project a name in my case I’ll just call it “EmailTeam” and change the Framework to be ‘.NET Framework 4.5.2’.
- Click OK and the project should be created.
- On the right-hand side, you should see the Solution Explorer window. Right-click ‘Activity1.xaml’ and select ‘Delete’. We won’t be needing this.
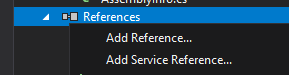
- Now right-click the ‘References’ entry in the Solution Explorer and select ‘Add Reference…’.
- A window will pop up, click ‘Browse…’ at the bottom-right.
- If you downloaded the CRM SDK Tools using the link I provided then you can navigate to ‘C:\Dynamics Dev Tools\Tools\PackageDeployment’ and select the files listed below, otherwise, locate the files below wherever you’ve downloaded the SDK.
- Microsoft.Crm.Sdk.Proxy.dll
- Microsoft.Xrm.Sdk.dll
- microsoft.xrm.sdk.workflow.dll
- Click Ok then OK in the window to import the dll files.
- Once that’s done, right-click the name of your project just right of the small green c# logo in the Solution Explorer, then click Add then Class.
- Give it a descriptive name such as ‘CreateActivityPartyFromTeam’ then click Add.
- You’ll now have a Class file which we can add some code into. I’ll cover that in the section below.
The Code
Now we’re going to populate the class file and then build the project, due to formatting restrictions in WordPress I’m just going to link you to the code on GitHub, be sure to follow the instructions below rather than just copying and pasting it all otherwise you will run into issues.
- Open the link below containing all of my code –
- Copy the entire file and paste it into your class in Visual Studio.
- Initially, you’re going to see a lot of errors and it’s easy to think you’ve done something wrong but it’s just because we haven’t yet added any References which are self-contained modules of code which we use (in this case it’s the CRM SDK).
- Right-Click ‘References’ in the Solution Explorer on the right and select ‘Add references’.
- In the window that appears go to the Browse page if you’re not on it already then click ‘Browse’ at the bottom right.
- Navigate to the CRM SDK that you downloaded and go into the ‘CoreTools’ folder.
- Select the following files then click Add –
- Microsoft.Crm.Sdk.Proxy.dll
- Microsoft.Crm.Sdk.dll
- Click OK in the Reference Manager window. Most of the errors will disappear but we’re still missing a reference.
- Right-Click References again and then select ‘Manage Nuget Packages’.
- Do a search for ‘Microsoft.Crmsdk.workflow’ and install the latest stable version that is supported by your CRM. In my case, this is 8.2.0.2 at the time of writing.
- Click OK to any warnings.
- All going well you should now have no errors at all displaying in Visual Studio.
Signing the Project
In order for the code to execute in CRM we need to sign it, which we do by creating a certificate. Luckily this is very easy to do in Visual Studio.
- Right-Click the name of the project in the Solution Explorer on the right-hand side and select Properties.

- In the left-hand navigation click ‘Signing’.
- Check ‘Sign the assembly’
- Click the empty drop-down and then select ‘<New>’ which will allow us to create a certificate.
- I’d suggest filling in the values similar to the image below, make sure your password is memorable and secure.

- Click OK and the certificate will be created.
Build the Project
- Save the project then click the ‘Build’ option in the menu at the top and click ‘Build Solution’.
- All going well you will see something along the lines of the text below in the Output window. If not you will need to either google the error it shows or comments below and I’ll try to help.

- Copy the address shown right of the ‘EmailTeam -> ‘ text in the Output window up to the last backslash (\).
- Open a file explorer on your computer and paste it into the address bar at the top then hit enter on your keyboard to go to that location.
- You should be seeing 5 files if you’re in the right location. The most important one being called * nameOfYourProject*.dll, in my case it’s called EmailTeam.dll.
Registering your Custom Workflow Step
So by this point, you’ve created the project containing all the required code and you’ve built the .dll file that we will use with a tool called the ‘PluginRegistration’ tool that can be found in the CRM SDK folder. This will register the plugin with CRM and allow us to use it in workflows and the likes in CRM.
- To start, access the ‘Plugin Registration’ folder located in the CRM SDK folder.
- Then run the ‘PluginRegistration.exe’ file.
- Once the program opens you’ll need to click ‘Create new connection’ at which point you’ll need to fill in the details to connect to your deployment. In my case, I’m going to connect to an Internet-facing on-premise deployment so my details are as below –

- Click Login, and you should see a list of registered plugins & custom workflow steps.
- Click ‘Register’ then ‘Register new Assembly’.
- The ‘Register New Assembly’ window will now open, we’ll want to set it up as follows in most circumstances –
- Step 1 – Select the .dll file we created in one of the earlier stages
- Step 2 – No change, leave all selected
- Stage 3 – Check ‘Sandbox’ if not already checked
- Step 4 – Select ‘Database’ if not already checked
- Finally, click ‘Register Selected Plugin’.
- All going well you will get a popup similar to below –

- The plugin is now registered with CRM and can be used in workflows as a custom step.
- From here you can then make use of the process in a workflow
Using the Process
This process can be used by creating a workflow and then adding a ‘Create Email step, ensuring that you don’t add a value in the To field.
- Click ‘Add Step’ and then scroll down and select ‘CreateActivityParty (1.0.0.2)’ or similar.
- Then select ‘CreateActivityParty.CreateActivityPartyFromTeam’ which will allow us to generate an activity party (what goes in the To field of an email) and then send the email to all individuals in a team.
- In Team enter a link to a valid team, normally I do this personally by having populated an ‘Owner (Team)’ field on the record the workflow is associated to, this could be a case or anything with an owner.
- Enter a link to the related email record you created in the previous step and then click ‘Save and Close’
- Once the workflow runs it should then dynamically populate who the email is sent to based on the individual team members.
